Software
Raspberry Pi and Modules configuration
In order to use the Raspberry PI, it is necessary to flash the SD card with the Raspberry Pi OS

Having done this, we can set up our enviroment and afterwards prepare the installation for the MagicMirror² software.
For starters we need to install the latest version of Node.js using the following instructions:
curl -sL https://deb.nodesource.com/setup_14.x | sudo -E bash -
sudo apt install -y nodejs
We clone the repository and finish the installation of MagicMirror² using npm. When the instruction is complete we can finally run the MagicMirror² software using the code below, and on the screen will appear the GUI in Fig.1
npm install
cp config/config.js.sample config/config.js
npm run start
 Fig.1: Default GUI
As already mentioned in project page, we kept the orginal clock, calendar and news modules that come with the install of MagicMirror² due to the fact that they were already geared with all the functionalities we looked for.
All that is needed for their configuration is reported at the end of this page in config.js file.
Instead for the weather and Spotify player modules we choose third-party modules respectively MMM-OpenWeatherForecast and MMM-NowPlayingOnSpotify.
For the sake of explanation, due to the similarities of the two third-party modules installation, we will show only the installation and configuration of MMM-NowPlayingOnSpotify module.
The instructions are the following:
cd modules
git clone https://github.com/raywo/MMM-NowPlayingOnSpotify.git
cd MMM-NowPlayingOnSpotify
npm install
To use this module we need to guarantee the access to the app, using the instructions below:
cd authorization
node app
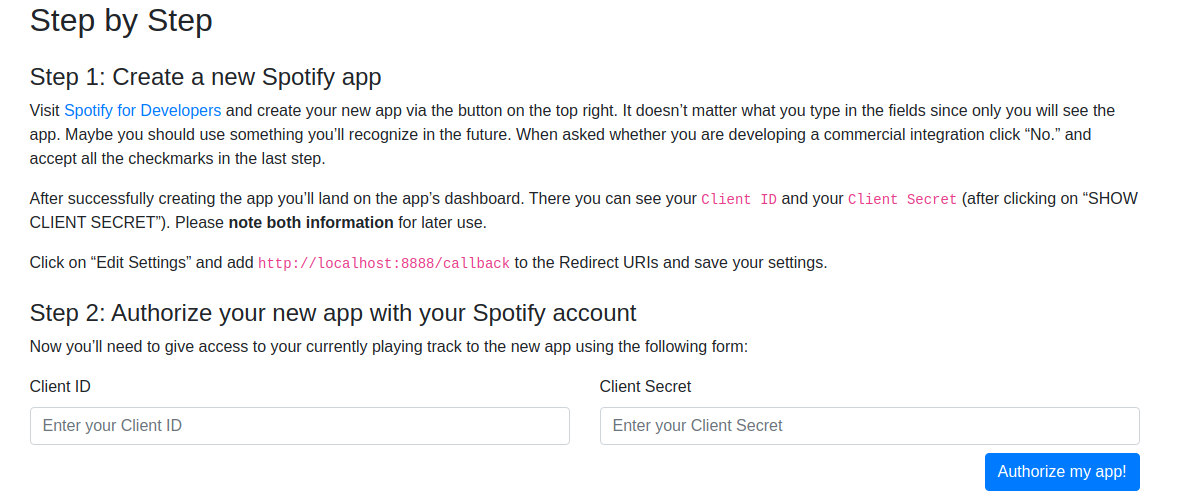 Fig.2 Authorization process
After the authorization process, in order to use correctly the MMM-NowPlayingOnSpotify, we have to modify the config.js file as it follows:
{
	module: "MMM-NowPlayingOnSpotify",
	position: "top_right",

	config: {
		showCoverArt: false,
		clientID: "YOUR_CLIENT_ID",
		clientSecret: "YOUR_CLIENT_SECRET",
		accessToken: "YOUR_ACCESS_TOKEN",
		refreshToken: "YOUR_REFRESH_TOKEN"
	}
}
After the set up of the two third-party modules, the config.js file will look like this:
	let config = {
		address: "localhost",

		port: 8080,
		basePath: "/",

		ipWhitelist: ["127.0.0.1", "::ffff:127.0.0.1", "::1"],

		useHttps: false,
		httpsPrivateKey: "",
		httpsCertificate: "",

		language: "it",
		locale: "it-IT",
		logLevel: ["INFO", "LOG", "WARN", "ERROR"],
		timeFormat: 24,
		units: "metric",

		modules: [
			{
				module: "alert",
			},
			{
				module: "updatenotification",
				position: "top_bar"
			},
			{
				module: "clock",
				position: "top_left",
				config:{
					displaySeconds: false,
				}
			},
			{
				module: "calendar",
				header: "Calendario",
				position: "top_left",
				config: {
					fetchInterval: 1000 * 30 * 1,
					calendars: [
						{
							symbol: "calendar-check",
							url: "iCALURL"					}
					]
				}
			},

			{
				module: "MMM-OpenWeatherForecast",
				position: "top_right",
				header: "Meteo Uniud",
				config: {
					apikey: "APIKEY",
					latitude: "46.08121",
					longitude: "13.21198",
					showDailyForecast: false,
					colored: false,
					iconset: "3c",
					hourlyForecastTableHeaderText: "Che tempo fa?",
					forecastHeaderText: "",
					forecastLayout: "table",
					hourlyForecastInterval: 1,
					maxHourliesToShow: 5,
					extraCurrentConditions: {
						highLowTemp: true,
						precipitation: true,
						sunrise: false,
						sunset: false,
						wind: false,
						barometricPressure: false,
						humidity: true,
						dewPoint: false,
						uvIndex: false,
						visibility: false,
					},
					hourlyExtras: {
						precipitation: true,
						wind: false,
						barometricPressure: false,
						humidity: true,
						dewPoint: false,
						uvIndex: false,
						visibility: false,
					},
				}
			},
			{
				  module: "MMM-NowPlayingOnSpotify",
				position: "top_left",
				config: {
					clientID: "CLIENTID",
					clientSecret: "CLIENTSECRET",
					accessToken: "ACCESTOKEN",
					refreshToken: "REFRESHTOKEN"
				  }
			},
			{
				module: "newsfeed",
				position: "bottom_bar",
				config: {
					feeds: [
						{
							title: "Ansa",
							url: "https://www.ansa.it/sito/ansait_rss.xml"
						}
					],
					showSourceTitle: true,
					showPublishDate: true,
					broadcastNewsFeeds: true,
					broadcastNewsUpdates: true
				}
			},
		]
	};

	/*************** DO NOT EDIT THE LINE BELOW ***************/
	if (typeof module !== "undefined") {module.exports = config;}
And in the end what will see on the screen is reported in Fig.3:
 Fig.3 Final GUI
To conclude this section, we have to point out that since there will not be a keyboard or a mouse attached,
we have to write a script in order to execute at boot the instructions of the smart mirror.
Using Crontab we designed the following script:
#!/usr/bin/python

import os
os.chdir("/home/pi/MagicMirror")
os.system("npm run start")
Features
In this section we summerise the characteristics of the modules described above, that can be seen in Fig.3:
The Clock module shows the correct hour and the full date;
The Weather module shows the temperature, weather forecast, chance of rain, humidity using GPS coordinates (we setted the UNIUD ones, as it can be seen in config.js) not only currently but also hourly;
The News module reports the latest news directly from a selected web page (we setted Ansa.it as can be seen in config.js);
-
The Calendar module linked with your personal Google calendar will display all your incoming events. In order to link it is necessary to use a iCal url, as can be seen in config.js, obtainable as shown here.
The Fig.4 and Fig.5 represent an example of what we said above: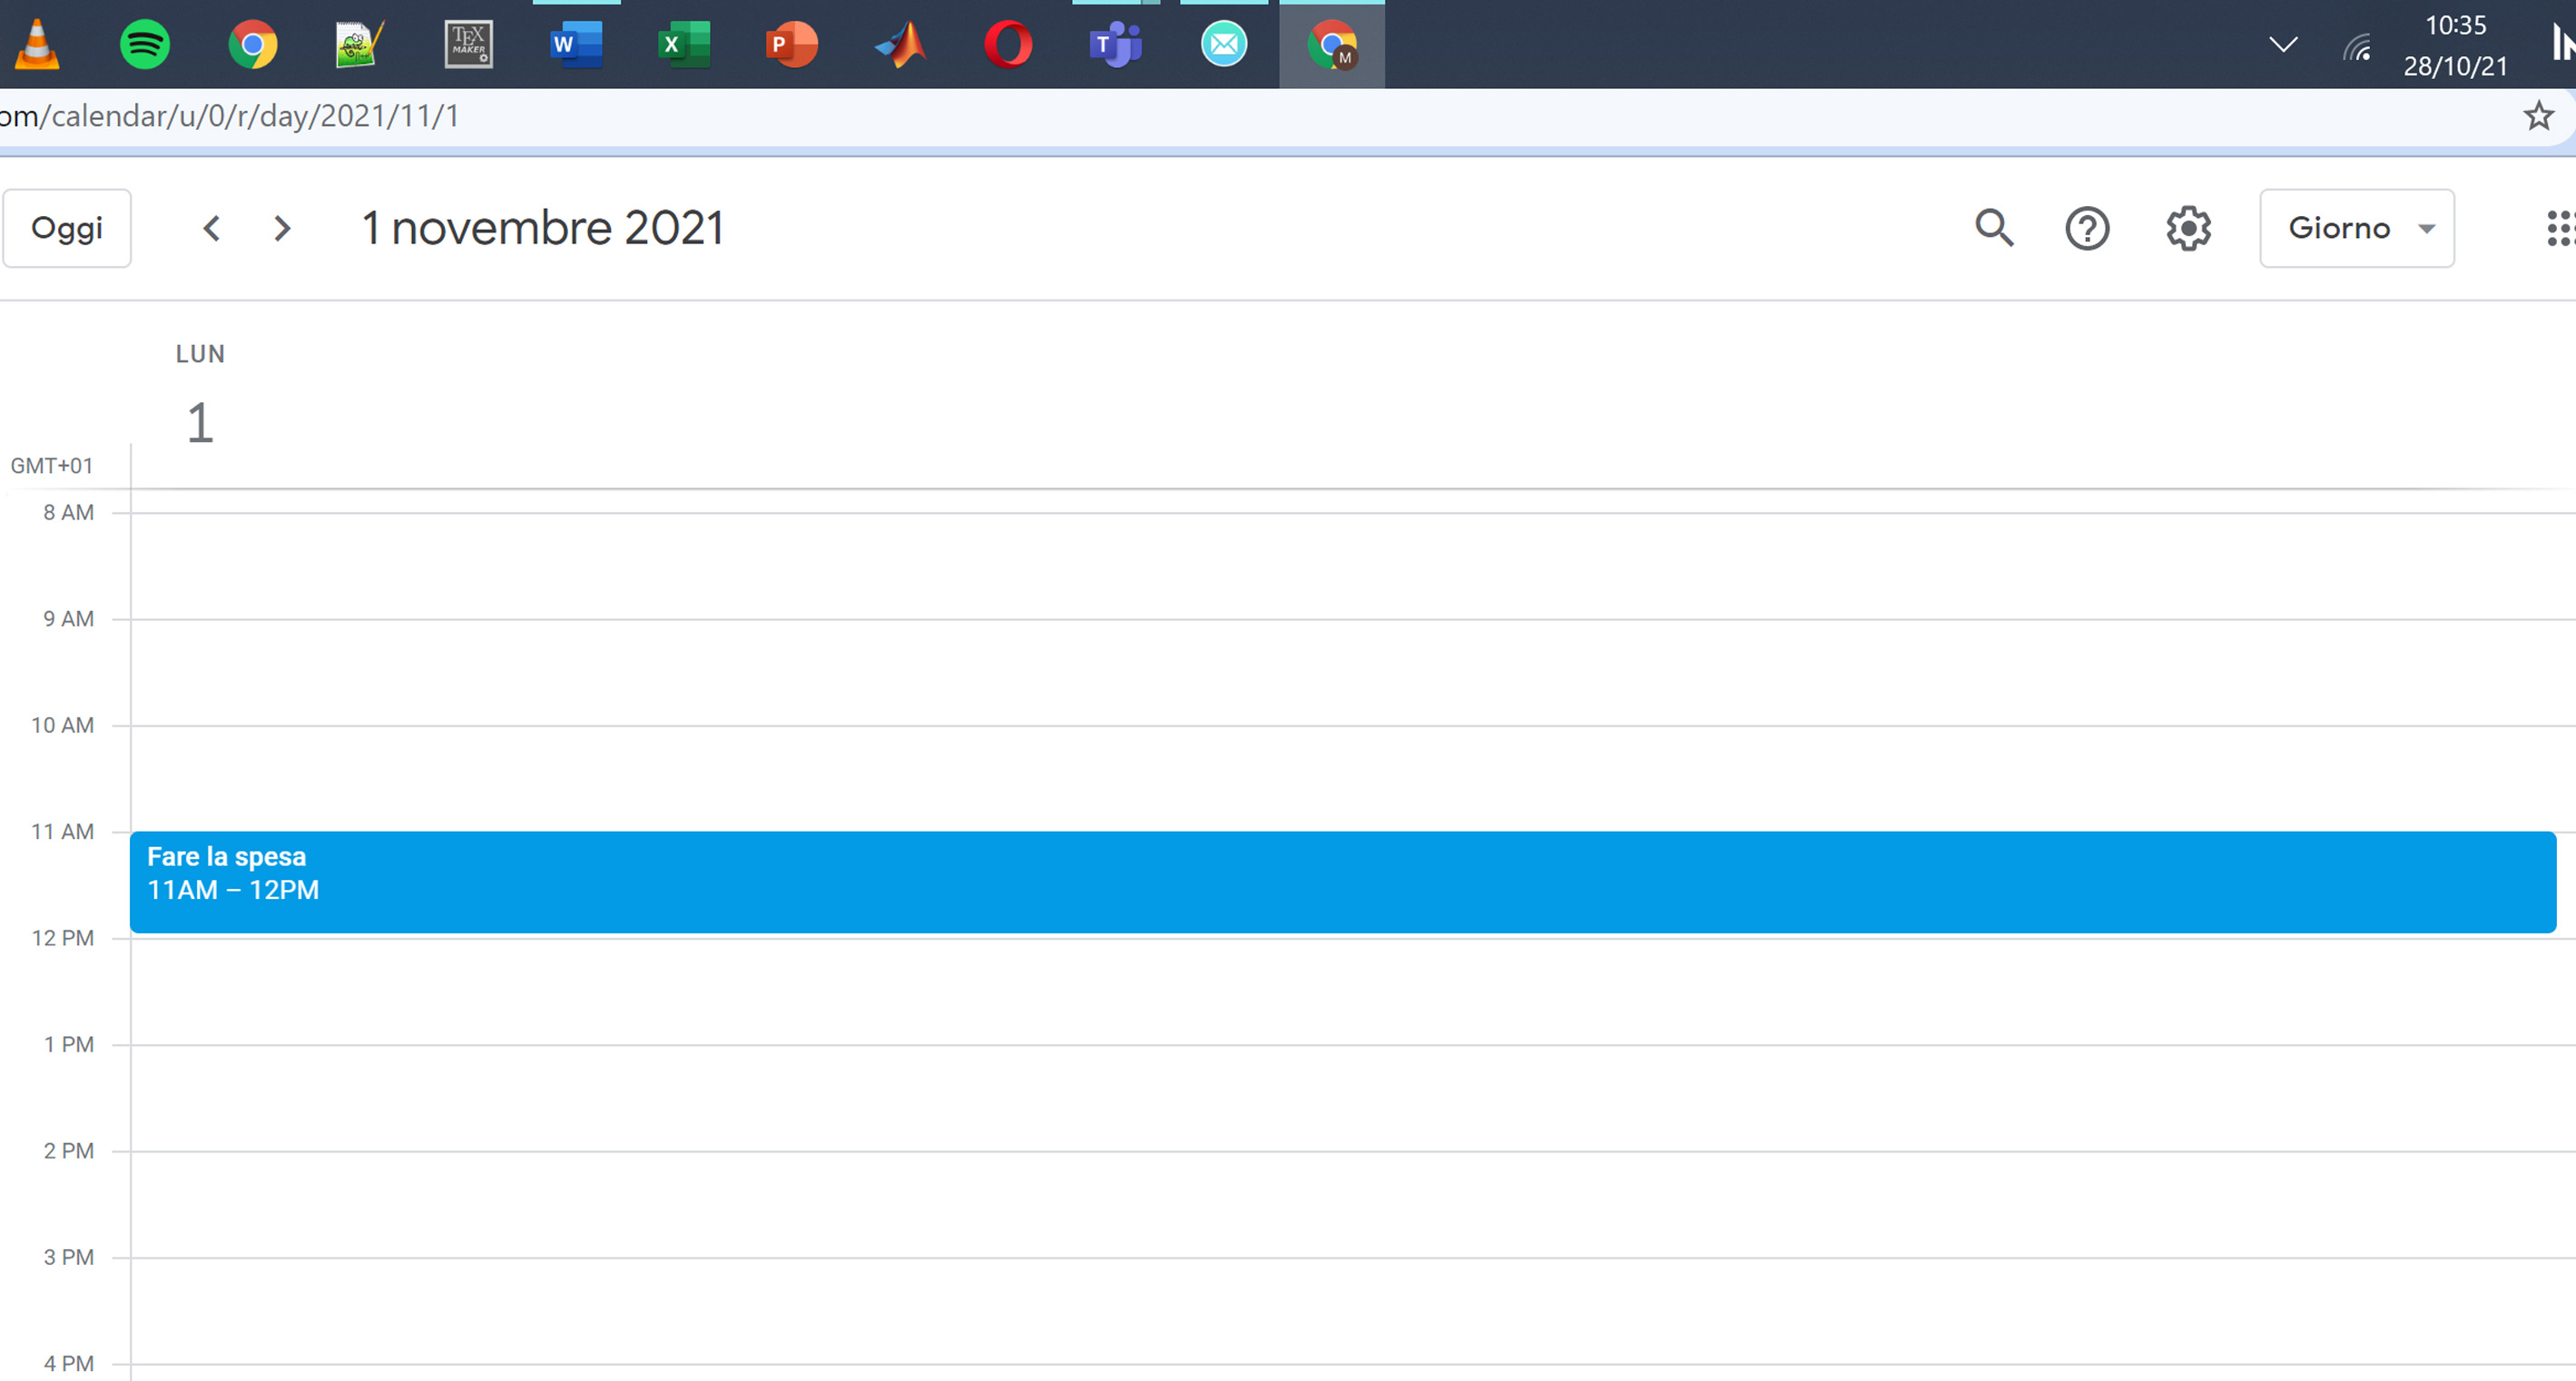
Fig.4: Google Calendar
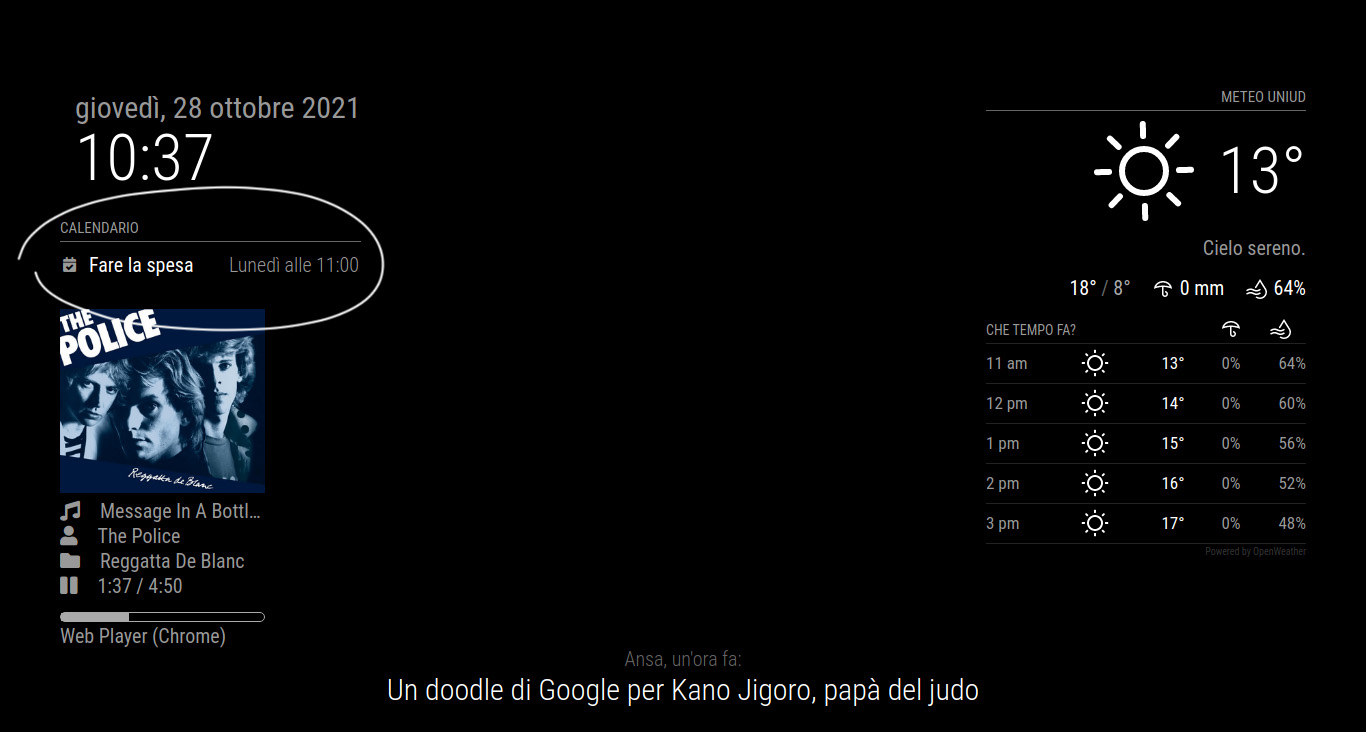
Fig.5: Calendar Module
The Spotify module displays the title, the length, the album’s name and cover to which the song, currently playing on the Spotify account linked with the module, belongs. This can be seen in the video below where we shuffle through a couple of songs.
Sonoff configuration
To use the “smart” capabilities of our Sonoff switch we downloaded its proprietary app, eWlink, from Google play and after logging in, using our Google account,
we connected the switch to our Wi-Fi network (on which was also connected the eWlink app) following the instruction reported here.
After the pairing is over we are able to control the on/off phase of our smart mirror from the eWlink app, as it can be seen in Fig.6.
To use the Google assistant on our smartphone we must connect the Sonoff to the Google home app. Luckily the eWlink app is already preset
to be connected to the Google home app (Fig.7) so the pairing between the two apps is fairly easy.
Once the pairing is completed we are able to fully control the turn on/off phase of the smart mirror via Google Home (Fig.8) and
via Google assistant as can be seen in the videos below.

Fig.6: eWlink control

Fig.7: Google Home pairing
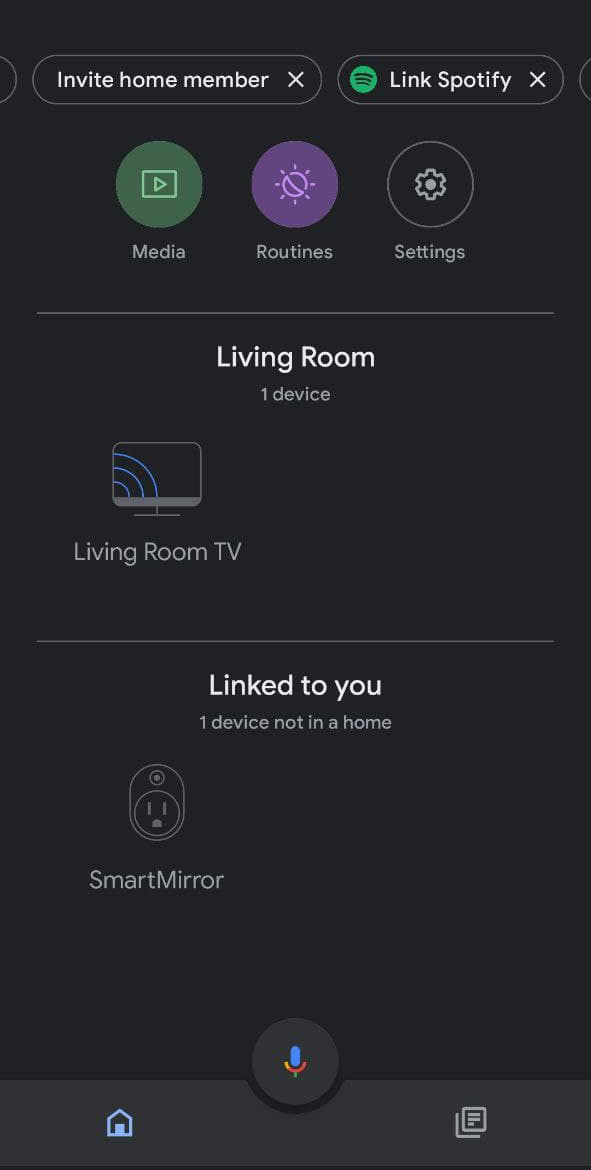
Fig.8: Google Home control
Vid.1: Turn on the Smart Mirror with vocal command
Vid.2: Turn off the Smart Mirror with vocal command
